Brief Overview of Cannabis Flowering
Today, we're going to talk about an essential aspect of cannabis cultivation: the flowering stage. The cannabis flowering process is when the plant shifts its focus from vegetative growth to producing those beautiful, potent buds we all know and love. This stage is crucial for growers, as it directly impacts the yield and quality of your cannabis harvest.
If you prefer visual content check out our YouTube channel here.
Table of Contents
Importance of Understanding the Flowering Process
Understanding the cannabis flowering process is vital for both new and experienced growers alike. It helps you recognize the signs that your plants are entering the flowering stage, allowing you to adjust your care routine accordingly.
Proper care during this critical period is key to maximizing bud size, potency, and overall yield.
By learning about the different phases of flowering, the unique needs of your plants during this stage, and the techniques to enhance bud development, you'll be well-equipped to grow some amazing cannabis.
So, let's dive in and explore the fascinating world of cannabis flowering!
The Cannabis Plant Life Cycle
Overview of the Life Cycle
Cannabis plants, like all living organisms, go through a series of stages during their life cycle. It starts with germination, where the seed sprouts and forms a small seedling. As the seedling grows, it enters the vegetative stage, which is characterized by rapid growth and the development of leaves, branches, and a strong root system.
After a certain period, depending on the plant's genetics and environmental factors, the cannabis plant transitions to the flowering stage. This is when the actual production of buds takes place, and the marijuana plant focuses its energy on creating flowers, rich in cannabinoids and terpenes.
Cannabis Flowering Stage vs. Vegetative Stage
The veg stage is all about growth and development. During this phase, marijuana plants are busy establishing a strong foundation to support future bud production. They require plenty of light, nutrients, and water to achieve vigorous growth.
Growers need to ensure that their plants receive 18-24 hours of light per day to maintain their vegetative state. The focus here is on creating a healthy plant structure, which includes developing a robust root system, strong branches, and plenty of leaves for photosynthesis.
On the other hand, the flowering cycle is where the magic happens. When the plants receive 12 hours of light and 12 hours of darkness per day, they are signaled to begin flowering. In this phase, the plant shifts its focus from vegetative growth to producing buds.
The cannabis plant's energy is directed towards creating flowers that are dense, aromatic, and rich in cannabinoids like THC and CBD. During this stage, growers need to pay close attention to the specific needs of their plants, such as adjusting nutrient ratios and maintaining proper environmental conditions.
This is the stage where the hard work pays off, and the quality of your harvest is determined.
Flowering Stage Triggers and Photoperiodism
Understanding Photoperiodism in Cannabis
Photoperiodism is the response of a plant to the length of day and night (light and dark periods). In the case of cannabis, photoperiodism plays a crucial role in determining when the plant transitions from the vegetative stage to the flowering stage.
Most cannabis varieties are categorized as short-day plants, meaning they require longer dark periods to initiate flowering. When the hours of darkness exceed a certain threshold, usually around 12 hours, the cannabis plant starts producing flowering hormones, ultimately leading to bud formation.
How to Trigger the Flowering Stage in Indoor and Outdoor Grows
For indoor grows, triggering the flowering stage is quite straightforward. Once your cannabis plants have reached the desired size during the vegetative phase, you can initiate flowering by adjusting the light schedule.
Switch your lights to a 12/12 cycle, providing 12 hours of uninterrupted darkness followed by 12 hours of light. It's essential to maintain this light cycle consistently, as any light interruptions during the dark period can stress the plant, leading to reduced yields or even causing the plant to revert to the vegetative state.
For outdoor grows, the process is a bit different since growers rely on the natural light cycle. In most cases, marijuana plants will naturally begin to flower as the days get shorter towards the end of summer and the beginning of fall.
However, if you want to have more control over the flowering stage in an outdoor grow, you can use light deprivation techniques.
This involves covering your plants with a light-blocking material, such as a tarp or a shade cloth, to artificially create a 12-hour dark period. This method allows growers to initiate flowering at their desired time, ensuring a more predictable harvest schedule.
Early Indications: Pre-Flowering and Initial Bud Formation
The Appearance of Pistils on Female Plants
As plants transition from the vegetative to the flowering period, one of the first signs of this change is the appearance of pistils.
Pistils are hair-like structures that emerge from the developing buds and play a vital role in the plant's reproductive process.

Female plants produce these pistils, which contain the stigma, a sticky surface that captures pollen from male plants for fertilization. In the early flowering stages, you'll notice these pistils as white or pale-colored hairs growing from the buds' sites, indicating that the female cannabis plant is entering the flowering phase. Often times you will see swollen calyces with pistils, and sometimes mistakenly think they are pollen sacs.
Growth Pattern Changes and Internodal Adjustments
When you start flowering cannabis you will see a change in the growth pattern of the plant. During the veg stage, the plants focus on producing foliage and increasing in size. However, as they enter the flowering stage, this growth pattern shifts, and the plant starts directing its energy towards producing flowers.
This change is often accompanied by a noticeable stretching of the plant, with internodal spaces (the distance between nodes or branching points) becoming longer. It's crucial to monitor these growth pattern changes, as they can help you anticipate when to adjust your lighting, nutrients, and other environmental factors to optimize bud development.
I spoke with Mr. Grow It, cannabis cultivation specialist, author, and host of the Garden Talk podcast, and he highlighted the significance of understanding the flowering process: "The flowering stage is arguably the most exciting stage for growers since flowers rapidly form on the plant. It's crucial to fine-tune your daily plant-care routine, ensuring your plants receive the appropriate nutrients, light, and environmental conditions needed for optimal bud development."
Gaia Green Power Bloom is an easy-to-use and long-lasting organic dry amendment that is suitable for use in both outdoor and indoor gardening. This complex, multi-ingredient blend contains high phosphorus and potassium levels, ideal for flowering and fruiting crops.
The Flowering Timeline: Week-by-Week Breakdown
Week 1: Setting the Stage
During the first week of flowering, a cannabis plant transitions from vegetative growth to producing buds. This pre flowering stage is marked by a rapid growth spurt, often referred to as "the stretch," during which the plant may double in height.
At this stage of the plants growth, you'll notice the formation of calyxes, small, teardrop-shaped structures that house the plant's reproductive organs, and the emergence of white pistils that look like little hairs that eventually turn into new buds!
Week 2: Pistil Proliferation and Bud Growth
In the second week of flowering, you'll see a significant increase in the number of white hairs, or pistils, growing from the bud sites. This is really where the flowering stage begins.
These hairs will spread across the plant, indicating that the actual buds themselves are starting to develop and the flowering stretch will continue.
Nutrient management and care requirements become particularly important during this phase, as the plant focuses its energy on growing buds and producing flowers. Switching from veg to flowering nutrients should happen at this point.
Week 3: Bud Development and Aroma Intensification
By the third week, the buds will continue to grow rapidly, and the plant's aroma will become more pronounced due to increasing trichome production. This is the end of early flowering. The trichomes that appear are tiny, glandular hairs that produce the plant's cannabinoids and terpenes. As they develop, they create the distinctive smell associated with cannabis flowers.
Week 4: Bud Swelling and Stickiness
During the fourth week of flowering, the buds will start to swell and become increasingly sticky. This stickiness is due to the trichomes producing more resin, which contains the plant's active compounds.
At this stage, it's essential to monitor the plant's environment and nutrient levels closely to ensure optimal bud development. This is when the plants would most likely experience a nutrient deficiency as they will be working very hard!
Weeks 5-6: Peak Flowering and Bud Fattening
As the plant enters the fifth and sixth weeks of flowering, it reaches its peak in terms of bud production. The buds will become denser, and their trichomes will continue to produce resin.
During this time, it's crucial to provide the plant with the right nutrients, light, and humidity levels to maximize yield and potency. Many growers will also have to support their plants with bamboo stakes at this point if they didn't trellis or put up support earlier
Weeks 7-8+: Ripening and Harvesting
In the final weeks of the flowering stage, the buds will continue to ripen, and their trichomes will mature. As the buds ripen, the pistils will change color from white to brownish-orange, signaling that the plant is nearing its harvest time.
Once you've determined that the buds are almost ready to be harvested, you can proceed to trim, dry, and cure your cannabis to enjoy the fruits of your labor.
Recognizing Male Cannabis Plants During Budding
Differentiating Male and Female Cannabis Plants


Male Plant
with Active Pollen Sacs
Female Plant
with Visible Pistils
It's essential to be able to differentiate between male and female plants during the budding stage, and earlier is better!
Male plants produce pollen sacs, which can pollinate and fertilize female plants, producing seeds instead of the desired smokable buds. To ensure a successful harvest, it's crucial to identify and separate the males from the females early in the flowering process.
There are several ways to tell the difference between male and female cannabis plants.
Generally, female plants have wispy white hairs called pistils that emerge from the nodes where the branches meet the main stem. These hairs serve as the plant's reproductive organs, waiting to catch pollen from nearby male plants.
On the other hand, male weed plants develop pollen sacs that resemble tiny, round balls hanging from the plant's nodes. These sacs will eventually burst and release pollen into the air, which can travel a considerable distance, potentially pollinating female plants in the vicinity.
Male plants usually develop these pollen sacs earlier than female plants develop their pistils, so keep a close eye on your plants as they enter the flowering stage.
It's crucial to remove male plants from your grow area as soon as you identify them. This ensures that your female flowering plants will focus on producing resinous, seedless buds known as sinsemilla, also known as "the good stuff"! By accurately identifying male and female plants and taking appropriate action, you can maximize your cannabis harvest and enjoy the fruits of your labor.
Boosting Bud Size: Techniques for Fattening Up Buds Before Harvest
Methods to Improve Bud Density and Size
When it comes to growing cannabis, one of the primary goals is to produce large, dense, and potent buds. There are several techniques that growers can use to fatten up their buds before harvest, ensuring a more bountiful and satisfying yield. Some of these methods include:
Plant training: Techniques like low-stress training (LST), high-stress training (HST), and the Screen of Green (ScrOG) method can be used to manipulate the plant's growth, allowing for better light penetration and air circulation. This results in the development of bigger, more substantial buds.
Pruning: By selectively removing unnecessary fan leaves and small, underdeveloped buds, you can redirect the plant's energy and resources towards the main colas, promoting more significant bud growth.
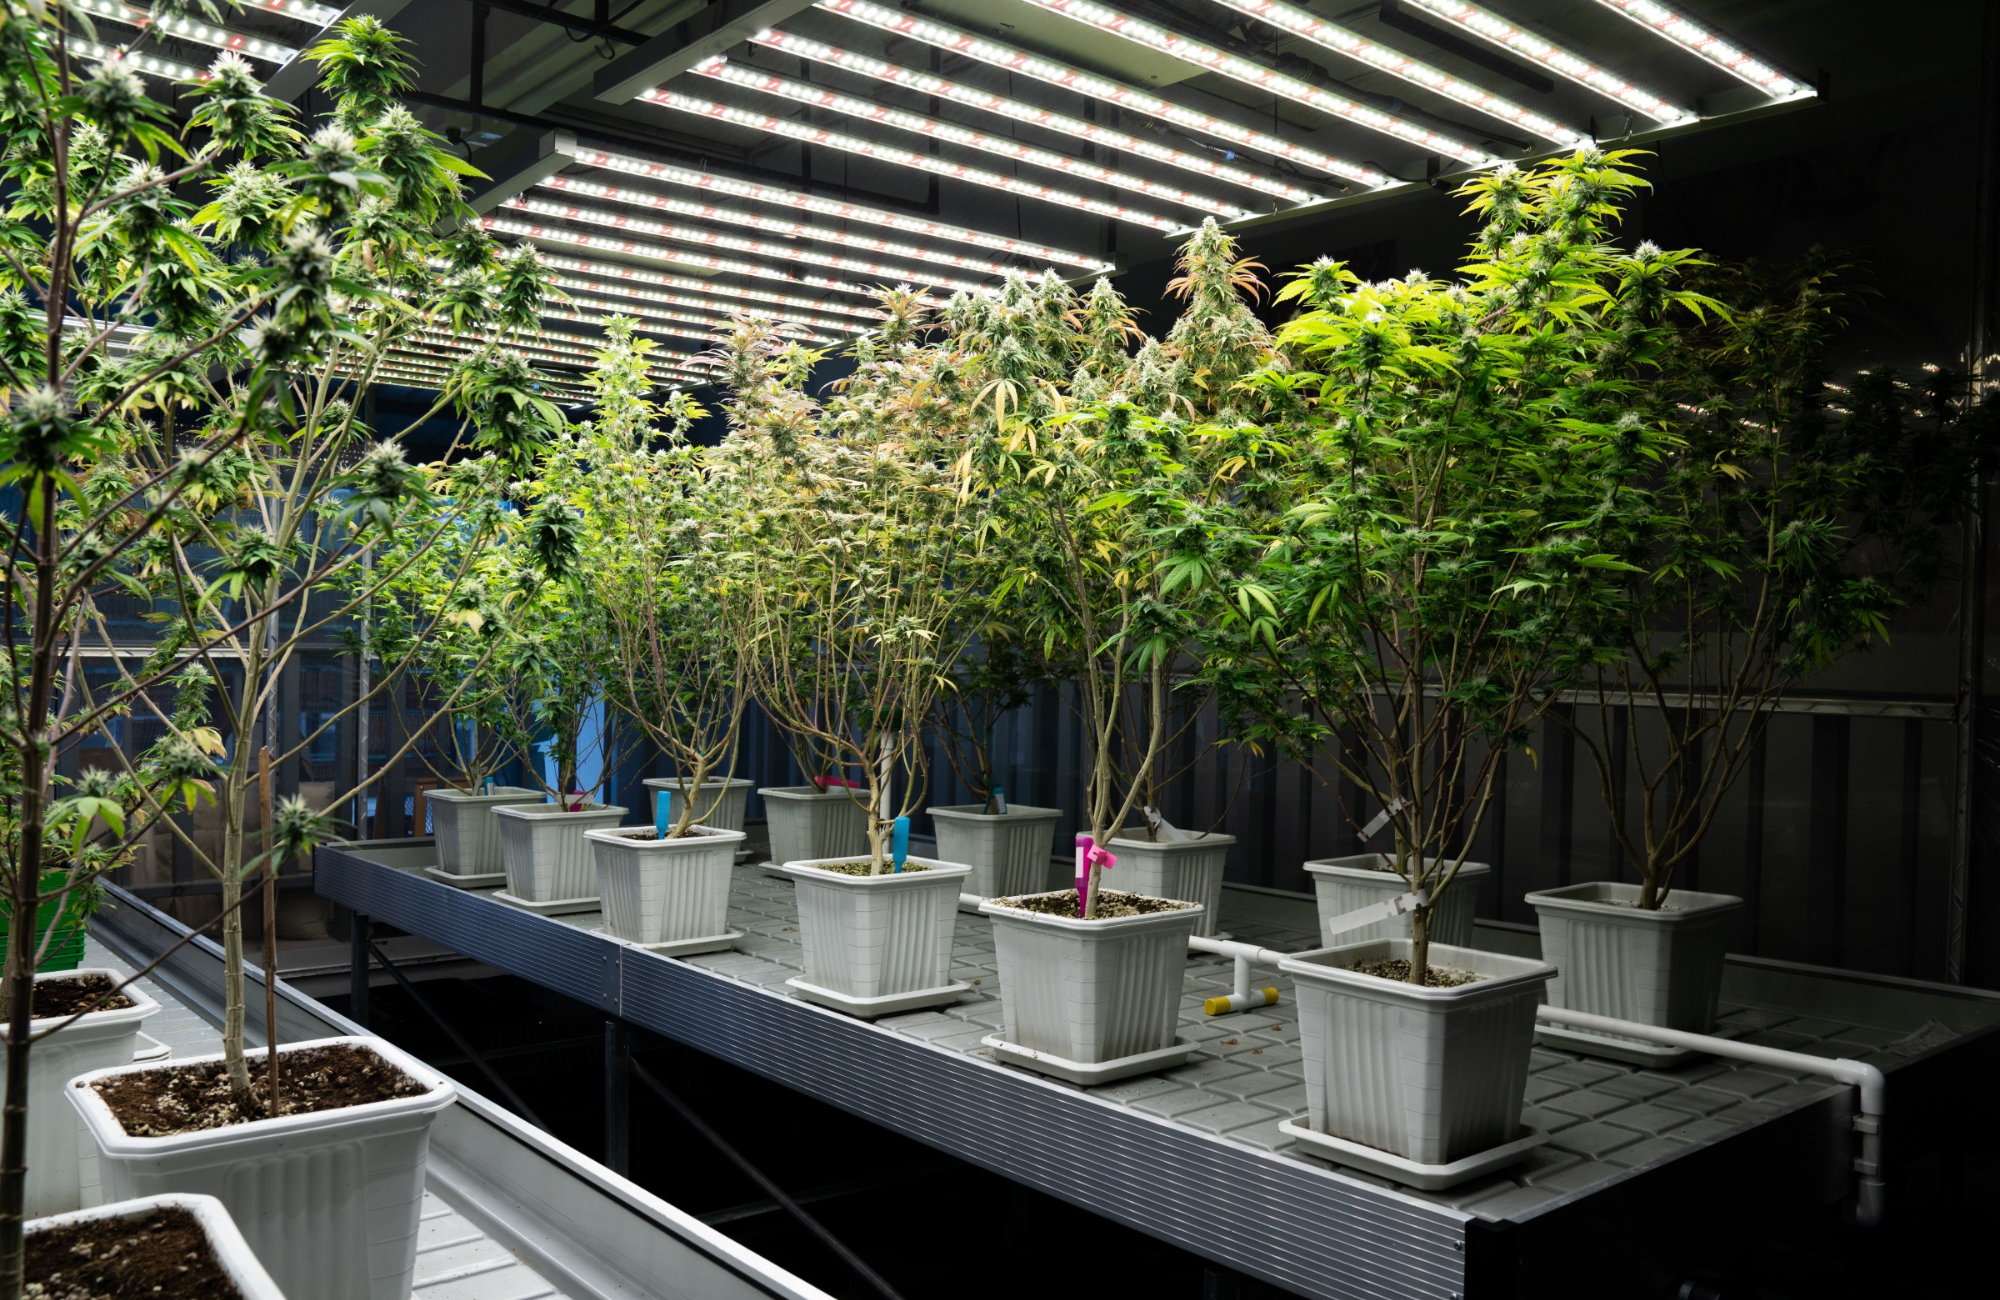
Optimal lighting: Ensuring your plants receive the proper light spectrum and intensity during the flowering stage is crucial for bud development. High-quality LED or HPS grow lights can help provide the optimal conditions for bud growth.
Nutrient management: Dialing in the proper nutrient regimen for your plants is crucial for maximizing bud density and size. This includes providing the right balance of macronutrients like nitrogen (N), phosphorus (P), and potassium (K) and ensuring adequate levels of micronutrients like calcium, magnesium, and iron. During the flowering stage, increasing phosphorus and potassium levels and reducing nitrogen levels are essential to promote bud growth.
CO2 enrichment: Enhancing the growing environment with additional carbon dioxide (CO2) can significantly increase bud size and density. Higher levels of CO2 allow the plants to photosynthesize more efficiently, leading to better overall growth. However, this method should be used with caution as it requires proper ventilation and monitoring to avoid any negative effects on the plants.
Proper environmental control: Maintaining the ideal temperature and humidity levels throughout the growing cycle is essential for optimal plant health and bud development. It is best to keep the temperature between 68°F to 77°F (20°C to 25°C) and the relative humidity around 40-50% during the flowering stage.
Bud boosters: Some growers use bud boosters, which are nutrient supplements specifically designed to increase bud size and density. These supplements contain ingredients like amino acids, vitamins, and carbohydrates to enhance plant metabolism and encourage bud growth. However, it is essential to use these products responsibly and in accordance with the manufacturer's guidelines to avoid overfeeding your plants.
Regarding Plant Growth Regulators (PGRs):
PGRs are synthetic chemicals that can manipulate plant growth and development, sometimes leading to increased bud size and density. However, we do not recommend using PGRs for several reasons:
-
Health concerns: Some PGRs have been linked to potential health risks, including hormone disruption and even cancer. The use of these chemicals in cannabis cultivation raises concerns about the safety and quality of the final product.
-
Product quality: PGRs can negatively impact the overall quality of cannabis, leading to a decrease in flavor, aroma, and potency. Many cannabis connoisseurs consider PGR-grown buds inferior to those grown without these chemicals.
-
Regulatory issues: In many regions, the use of PGRs in cannabis cultivation is prohibited, and their presence in the final product could lead to regulatory issues and penalties.
For these reasons, we do not recommend or sell PGRs for use in cannabis cultivation. Instead, we encourage growers to focus on natural and organic growing methods to achieve optimal bud size and density while maintaining the highest quality product.
By implementing these techniques and maintaining a keen eye on nutrient balance and environmental factors, you can boost the size and quality of your cannabis buds.
Determining the Optimal Size for Initiating Flowering
Evaluating Factors for the Ideal Flowering Size
When growing cannabis, it's essential to know when to initiate the flowering stage for the best results. Several factors influence the optimal size for starting the flowering process, including:
Grow space limitations: The size of your grow space will determine how large your plants can grow before initiating the flowering stage. It's crucial to consider the available height, width, and depth of your grow area, as well as anticipating how much your plants will continue to grow during the flowering stage. Proper planning ensures that your plants have enough space to thrive and develop full, healthy buds without overcrowding.
Plant genetics: Different strains and genetics will have varying growth patterns and final sizes, making it essential to understand the specific requirements of the strain you're growing. Indica-dominant strains generally have a more compact growth habit, making them suitable for smaller spaces, while sativa-dominant strains tend to stretch and grow taller, requiring more vertical space.
Hybrid strains may exhibit characteristics of both indica and sativa plants, so researching your chosen strain's growth tendencies will help you determine the ideal size to begin the flowering process.
Understanding Strain-Specific Variations and Requirements
Every cannabis strain has its unique set of characteristics, which means the ideal size for initiating the flowering stage may vary from one strain to another. To better understand the requirements for each strain, consider the following factors:
Expected stretch: Some strains will experience significant growth during the flowering stage, sometimes doubling or even tripling in size. Research your chosen strain to understand its specific growth patterns and adjust your timing accordingly.
Flowering duration: Different strains will have varying flowering durations, ranging from 6 to 14 weeks or more. Strains with longer flowering times may benefit from being switched to the flowering stage at a smaller size, as they will have more time to grow and develop during the flowering stage.
Yield potential: Some strains are known for producing higher yields, while others may produce smaller, more potent buds. Understanding the yield potential of your chosen strain can help guide your decisions regarding the optimal size for initiating the flowering stage.
You can maximize your plants' potential by carefully evaluating the factors that influence the ideal flowering size and understanding the strain-specific variations and requirements.
Monitoring and Caring for Cannabis Plants During Flowering
Proper Lighting, Temperature, and Humidity
During the flowering stage, maintaining the ideal environment for your cannabis plants is crucial for a successful harvest. Here's what you need to know:
-
Lighting: Cannabis plants require a specific light cycle during the flowering stage, typically 12 hours of light followed by 12 hours of uninterrupted darkness. Ensure that your grow lights are of high quality, providing the right spectrum of light for optimal bud development. LED or HPS lights are popular choices among growers.
-
Temperature: The ideal temperature for cannabis plants during the flowering stage is between 68°F to 77°F (20°C to 25°C). Temperatures that are too high or too low can stress your plants and negatively affect bud development.
-
Humidity: Aim for a relative humidity of 40% to 50% during the flowering stage. High humidity levels can encourage mold and mildew growth, while low humidity can cause plants to dry out and become stressed.
Nutrient Management and Feeding Schedules
Proper nutrient management is essential for healthy plant growth and bud development during the flowering stage. Keep the following in mind:
-
Switching to bloom nutrients: When your plants enter the flowering stage, it's important to switch from vegetative nutrients to bloom nutrients, which have a higher phosphorus and potassium content to support bud growth.
-
Feeding schedules: Monitor your plants closely and adjust nutrient levels based on their needs. Overfeeding can cause nutrient burn, while underfeeding can lead to deficiencies that may stunt growth and reduce yields.
-
Flushing: In the final weeks before harvest, flush your plants by providing them with plain water. This helps remove any excess nutrients and can improve the taste and quality of your buds.
Pest and Disease Prevention
Keeping your plants healthy and pest-free during the flowering stage is crucial for a successful harvest:
Inspect regularly: Regularly check your plants for signs of pests or diseases. Common cannabis pests include spider mites, aphids, and whiteflies, while diseases like powdery mildew and bud rot can devastate a crop.
Integrated Pest Management (IPM): Implementing an IPM strategy can help prevent and control pests and diseases in your grow space. IPM involves using a combination of biological, cultural, and chemical control methods to manage pests and diseases in a sustainable and environmentally friendly way. This includes introducing beneficial insects, like ladybugs and lacewings, to control harmful pests, as well as practicing crop rotation and maintaining proper sanitation in your grow area.
Preventive measures: Maintain a clean grow area and implement proper airflow and ventilation. Remove any dead or damaged plant material to reduce the risk of disease.
Treatment: If you discover pests or diseases, act quickly to treat the issue. Use organic, cannabis-safe pesticides or fungicides when possible, and always follow the manufacturer's instructions.
By paying close attention to lighting, temperature, humidity, nutrient management, and pest and disease prevention, you can ensure your cannabis plants thrive.
Harvesting and Curing Cannabis Buds
Identifying the Ideal Harvest Window
Monitoring the trichomes' color and cloudiness can help you determine the optimal harvest window, as different strains and desired effects may require slightly different timing.
Choosing the right time to harvest your cannabis buds is essential for maximizing potency, flavor, and overall quality. The ideal harvest window depends on several factors:

Trichome color: Examine the trichomes (tiny resin glands) on your buds under a magnifying glass or microscope. When the majority of trichomes turn from clear to a milky white or amber color, it's generally the right time to harvest. Some growers may prefer a higher ratio of amber trichomes for a more relaxing effect, while others may prefer more milky trichomes for a more uplifting experience.
Pistil color: Monitor the pistils (hair-like structures) on your buds. When about 70% to 90% of the pistils have changed from white to reddish-brown, it may be time to harvest.
Strain-specific considerations: Some strains may have unique characteristics or maturation times, so be sure to research your specific strain to determine the optimal harvest window.
Harvesting Techniques
The method you choose for harvesting your cannabis plants can vary depending on whether you're a commercial grower or a hobbyist. Here are some techniques to consider:
-
Whole plant harvesting: Commercial growers often prefer this method, as it allows for faster and more efficient harvesting. The entire plant is cut at the base, then hung upside down to dry.
-
Selective harvesting: Hobby growers may opt for this method, which involves cutting individual branches or buds as they reach peak maturity. This can result in a more even and controlled drying process.
-
Advanced techniques: Some growers may employ advanced techniques like "staggered harvesting," where different parts of the plant are harvested at different times based on maturity levels.
This can help maximize yields and potency.
Another technique is "flushing" the plants by providing only water without nutrients for the final week or two before harvest. This can help to remove excess nutrients from the buds, resulting in a smoother, cleaner taste.
The Curing Process and Its Importance
Curing your harvested cannabis buds is a crucial step that can significantly impact the final product's flavor, aroma, and potency. Proper curing involves the following steps:
Drying: Hang your harvested cannabis plants or branches in a dark, well-ventilated area with temperatures between 60°F and 70°F (15°C and 21°C) and humidity levels around 50%. Drying should take approximately 7 to 14 days. Use fans to circulate air and dehumidifiers to maintain optimal humidity levels.
Trimming: Once the buds are dry, carefully trim off the excess leaves to improve the buds' appearance and reduce harshness when consumed. Using sharp, sterile scissors or shears can help to avoid damaging the delicate trichomes.
Curing: Place the trimmed buds in airtight containers like glass jars, filling them about 75% full. Store the containers in a dark, cool area. Open the jars daily for the first week to release built-up moisture and gases, then gradually reduce the frequency over the next few weeks. Using humidity packs, like Boveda, can help maintain the optimal humidity level inside the jars and prevent mold growth.
Duration: The curing process can take anywhere from 2 to 8 weeks or longer, depending on the desired flavor and potency. The longer the cure, the smoother and more complex the taste. For connoisseur-quality cannabis, some growers may cure their buds for several months.
Whether you're a commercial grower or a hobbyist, following these advanced techniques and closely monitoring your plants during the harvesting and curing process can lead to a higher-quality final product.
By understanding the nuances of each step and tailoring your approach to your specific strain and growing conditions, you can maximize your cannabis buds' potency, flavor, and overall enjoyment.
Common Flowering Problems and Solutions
Identifying common issues during the flowering stage
Growing cannabis during the flowering stage can present a variety of challenges. Some common issues that growers may encounter include light burn, temperature and humidity fluctuations, pH imbalances, overcrowding, and hermaphroditism. It's essential to identify these problems early on to ensure a successful harvest.
Tips and solutions for overcoming these problems
-
Light burn and light stress: To avoid light burn or stress on your plants, ensure proper light placement and intensity during the flowering stage. Adjust the distance between the light source and the canopy according to the specific needs of your cannabis strain and the type of lighting you're using.
-
Temperature and humidity fluctuations: Maintaining consistent temperature and humidity levels throughout the flowering stage is crucial to prevent plant stress. While it is acceptable to have slightly lower temperature and humidity levels during the night, it is important to ensure that the environment does not become too cold and humid, as this can lead to issues like bud rot or slowed growth.
Avoid excessive fluctuations and invest in reliable equipment, such as temperature and humidity controllers, that will help maintain the optimal environment.
-
pH imbalances: Keep the pH levels in your growing medium within the optimal range for nutrient uptake. Regularly monitor and adjust the pH to prevent nutrient deficiencies or toxicities that can lead to poor plant health and reduced yields.
-
Genetics and plant quality: Select high-quality, genetically stable strains to minimize the risk of issues such as hermaphroditism or poor bud development. Start with reputable seed banks or nurseries, and choose strains that are well-suited to your growing conditions.
-
Hermaphroditism and light leaks: One common cause of hermaphroditism is light leaks during the dark period of the flowering stage. Light leaks can stress the plants, causing them to develop both male and female reproductive parts.
To prevent this issue, inspect your grow room for light leaks and seal any gaps or cracks. Also, ensure that your timers and light-blocking equipment are functioning correctly to maintain a consistent dark period.
By being proactive and addressing these common flowering problems, you can optimize your cannabis plants' health and maximize your yield at harvest time.
Conclusion
Summarizing the importance of understanding the cannabis flowering process
As we've explored throughout this article, the cannabis flowering process is a critical period in the plant's life cycle. Understanding each stage and the unique challenges that may arise during the flowering process is essential for any grower, whether you're a hobbyist or a commercial cultivator.
By familiarizing yourself with the various aspects of flowering cannabis, you'll be better equipped to ensure the health and success of your cannabis plants, ultimately leading to a bountiful harvest.
The value of attentive care and monitoring throughout the flowering stage
Attentive care and consistent monitoring throughout the flowering stage cannot be overstated. It's crucial to maintain a watchful eye on your plants to identify and address any issues that may arise promptly.
We want to thank you for taking the time to read this comprehensive guide on the cannabis flowering process. We understand that it's a long read, but we hope the information provided has been valuable and insightful.
By applying the knowledge shared in this article, you'll be well on your way to growing thriving cannabis plants and enjoying the fruits of your labor. Happy growing!

Author Biography | Christopher McDonald
Christopher McDonald, founder of Happy Hydro and avid gardening enthusiast, is devoted to revolutionizing sustainable gardening. As an authority in plant care with over 20 years of experience, Christopher balances leading his thriving company with tending to his lush garden. In his free time, he relishes exhilarating backpacking trips, psychedelic journeys, and cherishing moments with his family.


1 comment
Sean Lawrence
I really enjoyed reading this grow guide. Very helpful well explained. Good Info thumbs up